Showing posts with label Recipe. Show all posts

Tuesday, July 22, 2014

Homemade burgers

Jom buat beef burger sendiri.. kali ni cuba buat daging cincang di rumah. Resepinya mudah saja, guna resepi Jamie Oliver A Cracking Burger, tapi saya gunakan yang asas sahaja.

Saya gunakan 1kg daging untuk menghasilkan sebanyak 13 keping daging burger. Burger yang siap dibentuk ditutup dengan plastic cling wrap sehingga tiba masa untuk memasak menggunakan pan skillet. Roti bun pula saya sapu dengan butter dan toast sekejap di atas pan sebelum memasak daging burger.  Jom tengok resepinya.

Ingredients
  • 12 Jacob's cream crackers
  • 8 sprigs of fresh flat-leaf parsley
  • 500 g quality minced beef
  • 1 large free-range egg
  • sea salt
  • freshly ground black pepper
  • olive oil
  • 1 cos or round lettuce
  • 3 tomatoes
  • 1 red onion
  • 3-4 gherkins
  • 6 good-quality or fresh burger buns
  • 6 slices Cheddar cheese, optional
  • 2 heaped tablespoons Dijon mustard, optional
Method
There's nothing better than a homemade burger. Everyone loves them, they're easy to make and, if made with quality, fresh ingredients (and not over laden with greasy stuff), they certainly don't have to be unhealthy, especially if served with a salad. Once you've mastered this tasty basic recipe, you can make it your own with different herbs, spices and toppings. The sky's the limit – that's why cooking is so exciting. 

To make your burger:
Wrap the crackers in a tea towel and smash up until fine, breaking up any big bits with your hands, and put them into a large bowl.
Finely chop the parsley, including the stalks. Add the parsley, mustard, if using, and minced beef to the bowl. Crack in the egg and add a good pinch of salt and pepper.
With clean hands, scrunch and mix everything up well. Divide into 6 and pat and mould each piece into a roundish shape about 2cm thick. Drizzle the burgers with oil, put on a plate, cover and place in the fridge until needed (this helps them to firm up).

To cook your burger:
Preheat a large griddle or frying pan for about 4 minutes on a high heat. Turn the heat down to medium.
Place the burgers on the griddle or in the pan and use a spatula to lightly press down on them, making sure the burger is in full contact. Cook them to your liking for 3 or 4 minutes on each side – you may need to cook them in two batches.

To serve your burger:
Wash and dry a few small lettuce leaves, tearing up the larger ones. Slice the tomatoes. Peel and finely slice the red onion. Slice the gherkins lengthways as finely as you can. Place all this on a platter and put in the middle of the table with plates, cutlery, ketchup and drinks.
Remove your burgers to another plate and carefully wipe your pan or griddle clean with kitchen paper.
Halve your burger buns and lightly toast them on the griddle or in the pan. Also great with a chopped salad.

Jom buat daging cincang

Adun ramuan dan bentukkan, drizzle dengan minyak zaitun, cover dgn plastik dan sejukkan


Masak daging atas skillet. Oh ya lupa beli tomato, cuma hiris kobis aje la sebagai salad
Kenyang dan sedap :)

Wednesday, May 21, 2014

Kitchenware and Morrocan Chicken Tagine

Jom cuci mata tengok barangan dapur kat sini.. huu rambang mata dibuatnya.  :)


Cake stand yang cun

Periuk cast iron dan mug

Bekas simpan kopi, tepung, beras, gula dan teh

Periuk tagine

Sotong masak kari lagi
Dah beli tagine, terus cuba menu Morocco


Sedap.. :)


Chicken Tagine with Preserved Lemons and Olives

(Recipe from HERE)

Prep Time: 15 minutes

Cook Time: 2 hours, 30 minutes

Total Time: 2 hours, 45 minutes

Ingredients:

  • 1 whole chicken, skin removed, cut into pieces
  • 2 large white or yellow onions, very finely chopped
  • one small handful of fresh cilantro, chopped*
  • one small handful of fresh parsley, chopped*
  • 2 or 3 cloves of garlic, finely chopped or pressed
  • 2 teaspoons ginger
  • 1 teaspoon pepper
  • 1 teaspoon turmeric (or 1/4 teaspoon Moroccan yellow colorant)
  • 1/2 teaspoon salt
  • 1/4 teaspoon saffron threads, crumbled (optional)
  • 1 teaspoon smen (Moroccan preserved butter - optional)
  • 1 handful green or red olives, or mixed
  • 1 preserved lemon, quartered and seeds removed
  • 1/3 cup olive oil
  • 1/4 cup water, approximately

Preparation:

* Instead of chopping, you can tie the parsley and cilantro together into a bouquet and place on top of the chicken during cooking.

Prepare the Chicken

Remove the flesh from the preserved lemon, and finely chop it. Add the chopped lemon flesh to a bowl along with the chicken, onion, garlic, cilantro, parsley, spices and smen, and mix well. If time allows, let the chicken marinate in the refrigerator for several hours or even overnight.

To Cook the Chicken

Add enough of the olive oil to the tagine to coat the bottom. Arrange the chicken in the tagine (flesh-side down), and distribute the onions all around.
Add the olives and preserved lemon quarters, and drizzle the remaining olive oil over the chicken. Add the water to the tagine, cover, and place on a diffuser over a medium-low heat.
Give the tagine time to reach a simmer without peaking. If you don't hear the tagine simmering within 20 minutes, slightly increase the heat, and then maintain the lowest heat setting required for maintaining a gentle, not rapid, simmer.
Allow the chicken to cook undisturbed for 80 to 90 minutes, and then turn the chicken over so that it's flesh side up. Cover the tagine again, and allow the chicken to finish cooking until very tender.
Turn off the heat, and let the tagine to cool for about 10 to 15 minutes before serving. Moroccan tradition is to eat directly from the tagine, using Moroccan bread to scoop up the chicken and sauce. French fries are frequently served with this dish, and may even be placed on top of the chicken.

Tuesday, April 29, 2014

Red Velvet Cake

Pertama kali buat kek Red Velvet.. sebelum ni saya buat dalam bentuk cupcake aje..rasanya tak banyak beza kecuali masak dalam cake pan dan gunakan 2 jenis cheese untuk frosting. Kena buat kek yang special lah untuk besday orang tersayang :)

Tapi kek buat sendiri ni biasalah kan, comot-comot aje bolehlah setakat nak makan sendiri. Lagipun bab hias-hias ni saya memang tak pandai dan terpaksa minta tolong grand masterchef hias sendiri :p. Dari segi rasa mm memang sedaplah sebab ikut resepi.. Resepi saya ambil dari JoyofBaking. 
Pertama kali beli mascarpone cheese.. ada logo halal pulak tu

Potong untuk buat lapisan. Patutnya ada 4 lapisan tapi saya buat 3 je

Sapukan  frosting

Cuma sapu frosting di bahagian atas sebab takut muak bila terlalu banyak cheese

Sepotong kek

Oklah kan, comot-comot pun.. :p


Red Velvet Cake:

2 1/2 cups (250 grams) sifted cake flour

1/2 teaspoon salt

2 tablespoons (15 grams) regular or Dutch-processed cocoa powder

1/2 cup (113 grams) unsalted butter, at room temperature

1 1/2 cups (300 grams) granulated white sugar

2 large eggs

1 teaspoon pure vanilla extract

1 cup (240 ml) buttermilk

2 tablespoons liquid red food coloring

1 teaspoon white distilled vinegar

1 teaspoon baking soda

Cream Cheese Frosting:

1 - 8 ounce (227 grams) cream cheese, room temperature

1 - 8 ounce (227 grams) tub of Mascarpone cheese, room temperature

1 teaspoon pure vanilla extract

1 cup (115 grams) confectioners' (icing or powdered) sugar, sifted

1 1/2 (360 ml) cups cold heavy whipping cream (double cream) (35-40% butterfat)


Red Velvet Cake: Preheat oven to 350 degrees F (175 degrees C) and place rack in center of oven. Butter two - 9 inch (23 cm) round cake pans and line the bottoms of the pans with parchment paper. Set aside.

In a mixing bowl sift together the flour, salt, and cocoa powder. Set aside.

In bowl of your electric mixer, or with a hand mixer, beat the butter until soft (about 1-2 minutes). Add the sugar and beat until light and fluffy (about 2-3 minutes). Add the eggs, one at a time, beating well after each addition. Scrape down the sides of the bowl. Add the vanilla extract and beat until combined.

In a measuring cup whisk the buttermilk with the red food coloring. With the mixer on low speed, alternately add the flour mixture and buttermilk to the butter mixture, in three additions, beginning and ending with the flour.

In a small cup combine the vinegar and baking soda. Allow the mixture to fizz and then quickly fold into the cake batter. 

Working quickly, divide the batter evenly between the two prepared pans and smooth the tops with an offset spatula or the back of a spoon. Bake in the preheated oven for approximately 25 - 30 minutes, or until a toothpick inserted in the center of the cakes comes out clean. Cool the cakes in their pans on a wire rack for 10 minutes. Place a wire rack on top of the cake pan and invert, lifting off the pan. Once the cakes have completely cooled, wrap in plastic and place the cake layers in the refrigerator for at least an hour (or overnight). (This is done to make filling and frosting the cakes easier.)

Cream Cheese Frosting: In the bowl of your electric mixer, or with a hand mixer, beat the cream cheese and mascarpone cheese until smooth. Add the vanilla and confectioners sugar and beat until smooth. Using the whisk attachment, gradually add the heavy cream* (See Note) and whip until the frosting is thick enough to spread. Add more sugar or cream as needed to get the right consistency.

Assemble: With a serrated knife, cut each cake layer in half, horizontally. You will now have four cake layers. Place one of the cake layers, top of the cake facing down, onto your serving platter. Spread the cake layer with a layer of frosting.  Place another layer of cake on top of the frosting and continue to frost and stack the cake layers. Frost the top and sides of the cake. Can garnish the cake with sweetened or unsweetened coconut.

Serves 10 - 12 people.

Note: You must use a brand of heavy cream that whips very easily to stiff peaks. If you are using a brand of heavy cream that does not whip easily to stiff peaks then whip the heavy cream separately to stiff peaks and then fold it into the cream cheese mixture.


Sunday, April 13, 2014

RV Cupcake in a Jar

Agak lama juga terpesona tengok kek dalam balang @ jar ni.. tambah-tambah kek rainbow yang nampak berlapis-lapis kan. Kemudian ternampak kek RV pula dalam jar, terus rasa terpanggil-panggil nak buat. Bila nampak bekas bentuk tulip, sebijik macam dalam gambar tu dijual di sini haa apa lagi .. macam pucuk dicita ulam mendatang terus dapatkan balang dan buat kek ni. Kemudian barulah dapat tidur dengan lena hehehe..

Rancangan asal nak bagi cupcake RV untuk dijual disekolah semasa hari mengundi. Tapi tak jadi sebab orang-orang kat rumah ni memang peminat kek RV nombor satu. Akhirnya habis dimakan ahli keluarga sendiri aje la.. :)

Resepi RV cupcake saya rujuk dari JoyofBaking. Saya buat adunan 2 kali ganda untuk menghasilkan 24 cupcakes. Idea RV cupcakes in a jar pula saya dapat dari MyBakingAddiction.

Red Velvet Cupcakes:

1 1/4 cups (125 grams) sifted cake flour

1/4 teaspoon baking powder

1/4 teaspoon salt

1 tablespoons (10 grams) regular or Dutch-processed cocoa powder

1/4 cup (57 grams) unsalted butter, at room temperature

3/4 cups (150 grams) granulated white sugar

1 large egg

1/2 teaspoon pure vanilla extract

1/2 cup (120 ml) buttermilk

1 tablespoon liquid red food coloring

1/2 teaspoon white distilled vinegar

1/2 teaspoon baking soda


Cream Cheese Frosting:

8 ounces (227 grams) cream cheese, room temperature

1/2 teaspoon pure vanilla extract

1/2 cup (60 grams) confectioners' (icing or powdered) sugar, sifted

2/3 cup (160 ml) cold heavy whipping cream (double cream) (35-40% butterfat)


Red Velvet Cupcakes:
Preheat oven to 350 degrees F (175 degrees C) and line 12 muffin tins with paper cupcake liners.

In a large bowl sift together the flour, baking powder, salt, and cocoa powder.

In the bowl of your electric mixer, or with a hand mixer, beat the butter until soft (about 1-2 minutes). Add the sugar and beat until light and fluffy (about 2-3 minutes). Add the egg and beat until incorporated. Scrape down the sides of the bowl. Add the vanilla extract and beat until combined.

In a measuring cup whisk the buttermilk with the red food coloring. With the mixer on low speed, alternately add the flour mixture and buttermilk to the butter mixture, in three additions, beginning and ending with the flour.

In a small cup combine the vinegar and baking soda. Allow the mixture to fizz and then quickly fold into the cake batter.

Working quickly, divide the batter evenly among the 12  muffin cups and smooth the tops with an offset spatula or the back of a spoon. Bake in the preheated oven for approximately 18 - 23 minutes, or until a toothpick inserted in the center of the cupcakes comes out clean.

Cool the cakes in their pans on a wire rack for 10 minutes and them remove from pan. Let cool completely before frosting. Either spread the frosting with a knife or offset spatula, or use a large 1M Wilton open star decorating tip to pipe the frosting.

Cream Cheese Frosting: In the bowl of your electric mixer, or with a hand mixer, beat the cream cheese until smooth. Add the vanilla and confectioners sugar and beat until smooth. Using the whisk attachment, gradually add the heavy cream* (See Note) and whip until the frosting is thick enough to pipe. Add more sugar or cream as needed to get the right consistency.

Makes 12 cupcakes.

Note: You must use a brand of heavy cream that whips very easily to stiff peaks. If you are using a brand of heavy cream that does not whip easily to stiff peaks then whip the heavy cream separately to stiff peaks and then fold it into the cream cheese mixture.


Saya buat buttermilk sendiri dengan mencampurkan 1 sudu besar jus lemon dengan 1 cawan susu dan dibiarkan selama 5-10 minit.

Balang Weck berbentuk tulip buatan Jerman yang sesuai untuk jem dan sebagainya

Cupcake RV

Kek RV yang dipotong dan dimasukkan dalam bekas, diselang seli dengan lapisan cream cheese :)

Warna merahnya tak berapa menyerlah kerana saya letak sedikit saja pewarna

Tabur dengan gula sprinkles bentuk love

Ros merah penyeri meja makan

Hidangan untuk tetamu yang bertandang iaitu laksa perth :)

Tuesday, April 1, 2014

Pancake for breakfast

Jom tengok resepi mudah untuk sarapan iaitu pancake!

Selain dari mudah disediakan, ada berbagai cara untuk menikmatinya. Pancake ini sangat sedap dimakan dengan maple syrup, jem, peanut butter, hazelnut spread (nutella) dan ditambah dengan buah-buahan.. terpulang kepada selera masing-masing.

Resepi (saya rujuk dari SINI)

Ingredients
1 1/2 cups milk
1 egg
2 teaspoons vanilla extract
2 cups self-raising flour
1/4 teaspoon bicarbonate of soda
1/3 cup caster sugar
25g butter, melted

Method

Whisk milk, egg and vanilla together in a jug. Sift flour and bicarbonate of soda into a bowl. Stir in sugar. Make a well in centre. Add milk mixture. Whisk until just combined.

Heat a large non-stick frying pan over medium heat. Brush pan with butter. Using 1/4 cup mixture per pancake, cook 2 pancakes for 3 to 4 minutes or until bubbles appear on surface. Turn and cook for 3 minutes or until cooked through. Transfer to a plate. Cover loosely with foil to keep warm. Repeat with remaining mixture, brushing pan with butter between batches. Serve.
Cuba beli maple syrup yang asli

Masa nilah nak gunakan pancake maker. Cuma buat adunan dan boleh suruh anak-anak masak guna ni :)

Atau boleh juga gunakan non stick pan

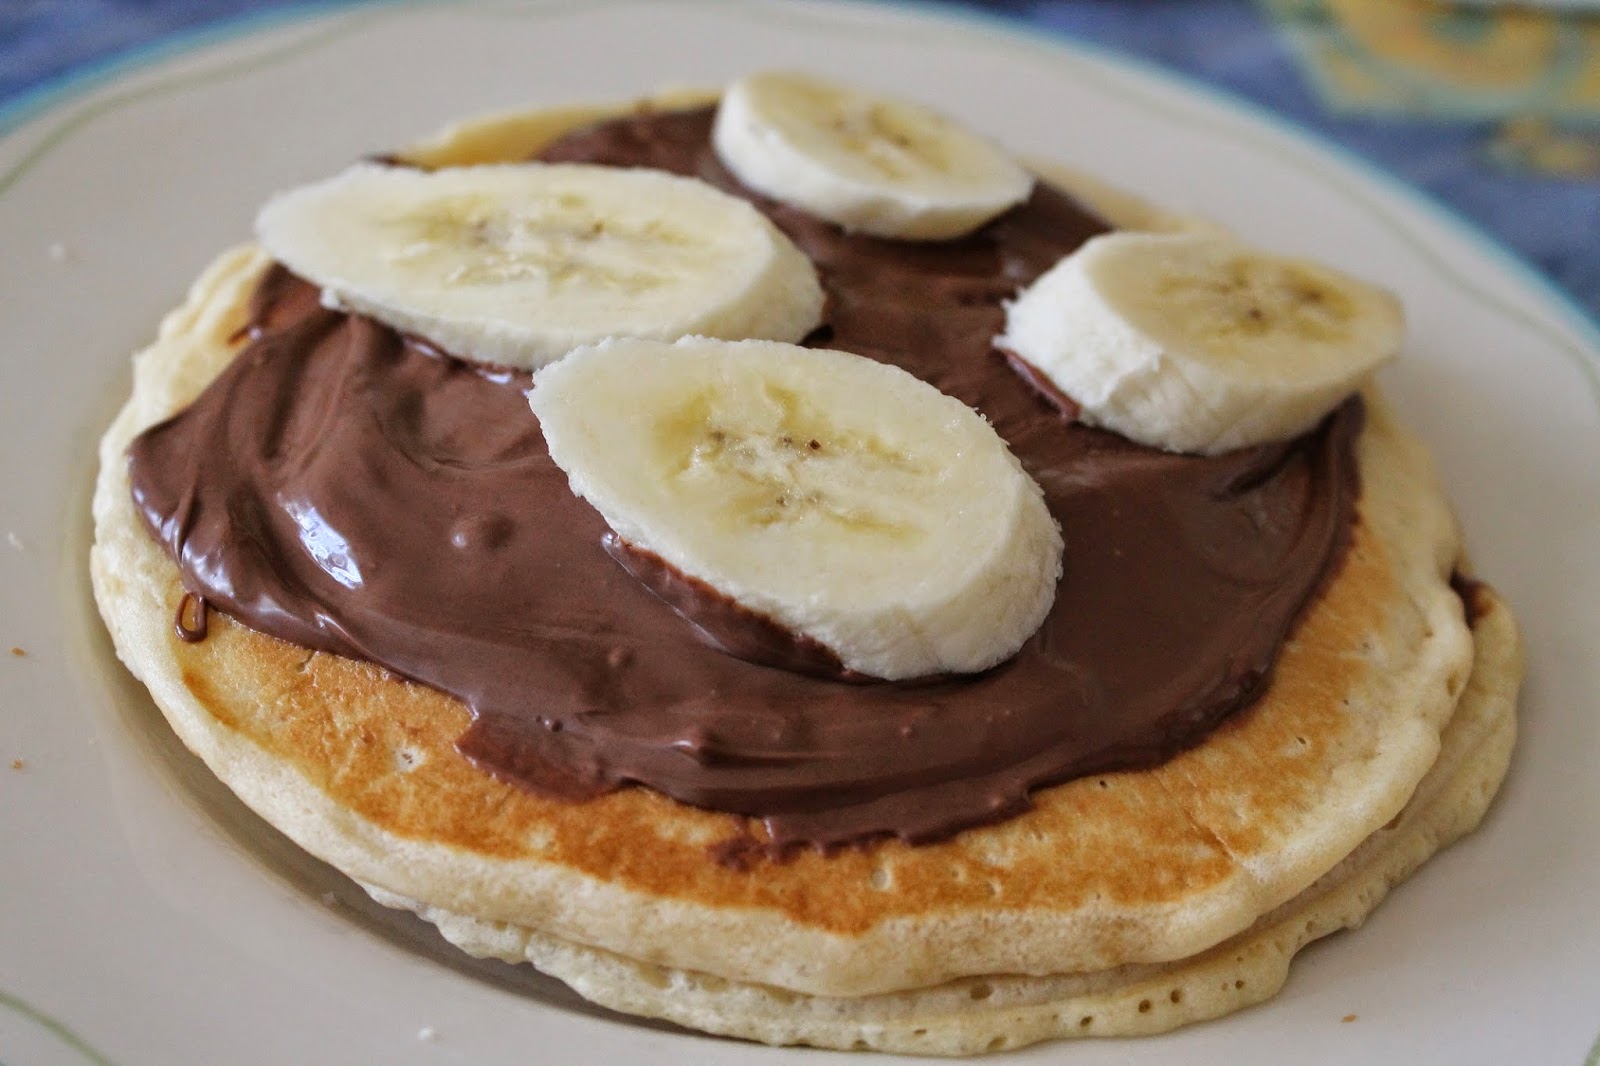
Sapu nutella dan hidangkan dengan buah-buahan

Mudah dan sedap. Kalau makan ni kat cafe mungkin kena bayar sampai $10

Atau tuang maple syrup. mm.. lazat sekali :)


Tuesday, March 4, 2014

Ayam masak merah special

Jom layan ayam masak merah pula..

Dalam resepi ni saya gunakan kepak ayam.. terpulanglah nak guna mana-mana bahagian ayam pun, sebelum ni saya gunakan paha ayam tapi rasanya sedap pulak kalau gunakan bahagian ni pula :)


Ayam Masak Merah (anggaran 1 kg ayam)

Bahan
Ayam
Kunyit
Garam

Bahan kisar
2 ulas bawang besar
20 biji cili kering
3 ulas bawang putih
Seinci halia
1cm belacan

Bahan tumis
2 inci kulit kayu manis
2 kuntum bunga lawang
5 kuntum bunga cengkih
1 biji buah pelaga
2 ulas bawang merah (dipotong halus)
2 ulas bawang putih (dipotong halus)

Bahan lain
Sedikit gula
Sedikit garam
Setengah tin susu cair
Tomato (jika suka)
Gajus
Hirisan bawang besar (dipotong berbentuk cincin)
Daun pudina

Cara
Bersihkan ayam, lumur dengan garam kunyit dan digoreng terlebih dahulu sehingga hampir garing.

Ketepikan ayam dan ambil sedikit minyak gorengan ayam untuk menumis bahan pelengkap. Tumis bahan tumisan sehingga berbau wangi.

Kemudian masukkan bahan kisar dan masak dengan api sederhana sehingga pecah minyak.

Masukkan sedikit gula dan garam (pastikan sedikit sahaja kerana ayam goreng telah diletakkan garam), serta susu cair. Masukkan ayam dan kacau rata.

Akhir sekali masukkan gajus, hirisan bawang besar, tomato (dipotong berbaji) serta daun pudina. Apabila bawang dan daun pudina telah layu, tutup api dapur. Sedia dimakan dengan nasi

Monday, February 17, 2014

Serawa Labu

Dah lama asyik bertangguh nak beli butternut pumpkin ni akhirnya baru terbeli. Sebelum tu jom kita tengok sedikit info.

Butternut squash (Cucurbita moschata), also known in Australia and New Zealand as butternut pumpkin, is a type of winter squash. It has a sweet, nutty taste similar to that of a pumpkin. It has yellow skin and orange fleshy pulp. When ripe, it turns increasingly deep orange, and becomes sweeter and richer. It grows on a vine. The most popular variety, the Waltham Butternut, originated in Waltham, Massachusetts, where it was developed at the Waltham Experiment Station by Robert E. Young.[1][2][3] Dorothy Leggett, widow of Charles Leggett, claims that the Waltham Butternut squash was developed by her husband, Charles Leggett, in Stow, Massachusetts, and then subsequently introduced by him to the researchers at the Waltham Field Station.[4]
Sumber: Wikipedia

Menurut laman web ini lagi:  Butternut squash is a vegetable that can be roasted, toasted, puréed for soups, or mashed and used in casseroles, breads, and muffins.

Hmm menarik bukan? Tapi rasanya lama tak makan serawa. Buat serawa dululah, lain kali cuba resepi lain pula :)
Harganya boleh tahan mahal, hanya separuh ni dah hampir $5

Kena buang kulit dan potong-potong dulu

Rendam sebentar dalam air kapur, toskan dan rebus separuh masak. Buangkan air rebusan

Masukkan santan, daun pandan, air gula merah dan rebus sampai empuk. Seeloknya letak sagu baru best

Hidangan minum petang yang ekspress. Sedap dan maniss

Minum bersama teh O panas. Set teko dan cawan dibeli dari Sunday Market

Cantik sekali.. siapa pandai teka dari negara mana asalnya set cawan dan teko ni?